Building a deck can be a rewarding project that adds valuable outdoor living space to your home. A key component of a well-constructed deck is its frame, which serves as the foundation for the entire structure.
In this guide, we’ll take you through the step-by-step process of building a deck frame, from gathering the necessary tools and materials to finishing with railings and stairs. Whether you’re a seasoned DIY enthusiast or a first-time builder, these essential tips will help you create a sturdy and safe deck that you can enjoy for years to come.
Gather the Necessary Tools and Materials
Before you embark on your deck-building journey, it’s crucial to gather all the tools and materials you’ll need. Having everything on hand will streamline the construction process and prevent unnecessary delays. Here’s a list of the essentials:
Tools:
- Tape measure
- Level
- Circular saw
- Drill
- Adjustable wrench
- Shovel
- Post hole digger
- Safety glasses
- Hearing protection
- Work gloves
Materials:
- Pressure-treated lumber
- Concrete mix
- Metal post anchors
- Ledger board
- Joist hangers
- Galvanized screws
- Decking boards
- Railing materials (if desired)
Ensure you have the correct quantities of each item, and don’t forget to prioritize safety by wearing appropriate protective gear. If you have no materials or equipment you’re in dire need of decksforlife.ca.
Choose the Right Location for Your Deck
Selecting the ideal location for your deck is crucial to its longevity and functionality. Consider factors such as sun exposure, proximity to the house, and local building codes. Here are some key points to keep in mind:
- Sun Exposure: Determine whether you want your deck to receive full sun, partial shade, or be in a shaded area. The orientation of your deck can affect your outdoor experience throughout the day.
- Proximity to the House: Ensure that your deck is easily accessible from the house. Having a sliding door or access point leading directly to the deck is practical.
- Local Building Codes: Research your local building codes and obtain any necessary permits. Compliance with regulations is essential to avoid potential legal issues in the future.
Determine the Size and Shape of Your Deck
Next, you’ll need to decide on the size and shape of your deck. This step involves careful planning to make the most of your outdoor space. Consider the following:
- Purpose: Determine the primary use of your deck. Will it be for dining, entertaining, or simply relaxing? This will influence its size and layout.
- Available Space: Measure the available space in your yard and ensure that your deck’s dimensions fit comfortably within it.
- Design: Choose a deck design that complements your home’s architecture and matches your style.
Mark the Layout and Set the Footings
With your design in mind, it’s time to mark the layout and set the footings. This step is essential for ensuring that your deck is level and stable. Here’s how to do it:
- Mark the Layout: Use stakes and string to outline the shape and dimensions of your deck on the ground. This serves as a visual guide for the construction process.
- Set the Footings: Dig holes for the footings according to your local building codes. Typically, footings should extend below the frost line to prevent shifting. Pour concrete into the holes and insert metal post anchors while the concrete is still wet.
Install the Ledger Board
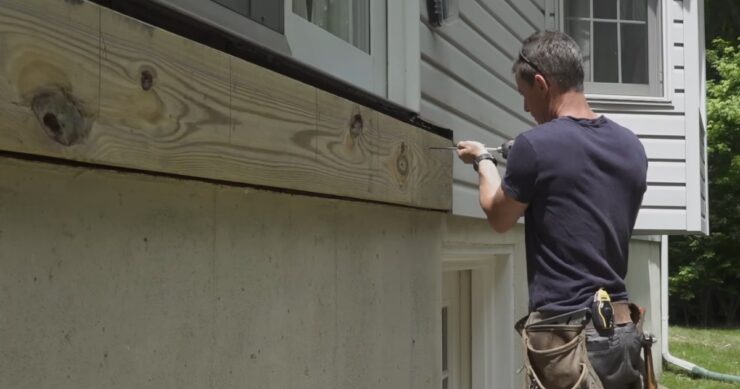
The ledger board is a critical component that attaches your deck to the house. It must be installed correctly to ensure the structural integrity of your deck. Follow these steps:
- Locate the Ledger Board: Position the ledger board against the house at the desired height. Ensure that it’s level and aligned with your layout markings.
- Attach the Ledger Board: Drill pilot holes through the ledger board and into the house’s framing. Secure the ledger board using galvanized screws. Be sure to follow the manufacturer’s recommendations for fasteners.
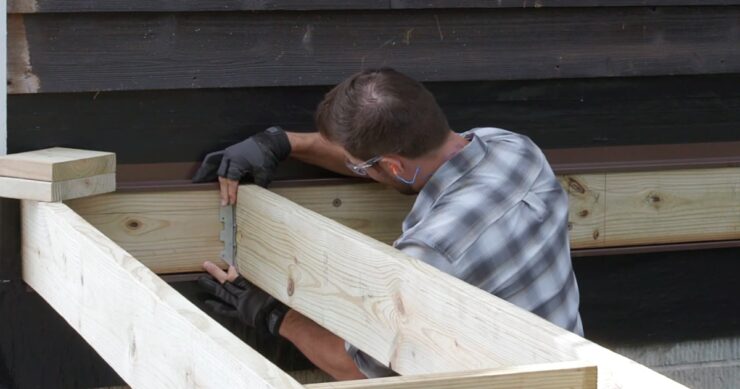
Create a Solid Beam Structure
The beams of your deck frame provide supports and decking boards. Building a solid beam structure is vital for the safety and longevity of your deck. Here’s how to do it:
- Select Beam Material: Choose pressure-treated lumber that matches the size and length required for your deck design.
- Install Beams: Position the beams across the tops of the support posts. Use joist hangers and galvanized screws to secure them in place. Ensure that the beams are level and evenly spaced.
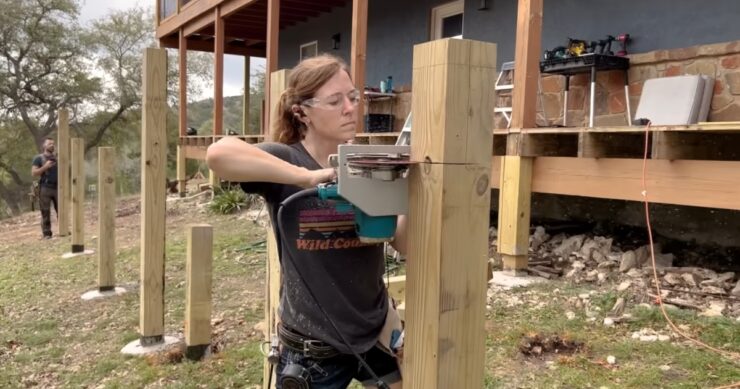
Install Support Posts
Support posts are the vertical columns that provide stability to your deck. Proper installation of these posts is crucial to prevent sagging or tilting. Follow these steps:
- Position Support Posts: Place support posts on top of the concrete footings, ensuring they align with your layout markings.
- Secure Support Posts: Attach metal post anchors to the top of each support post. These anchors will connect the posts to the beams securely.
- Check for Level: Use a level to confirm that the support posts are perfectly vertical before proceeding.
Add Joists for Deck Decking
Joists are horizontal framing members that run perpendicular to the beams. They provide the surface for attaching decking boards. Here’s how to install joists:
- Space Joists Correctly: Determine the spacing between joists based on your decking material and local building codes. Typically, 16 inches on center is a standard spacing.
- Attach Joists: Secure joists to the beams using joist hangers and galvanized screws. Ensure that they are level and evenly spaced.
Ensure Proper Spacing and Leveling
As you begin to attach the decking boards, it’s essential to maintain proper spacing and ensure that everything is level. Here’s what to keep in mind:
- Spacing: Leave a small gap between decking boards to allow for water drainage and expansion. Follow the manufacturer’s recommendations for spacing.
- Leveling: Use a level to check that the decking boards are even and flat. Make any necessary adjustments to maintain a smooth surface.
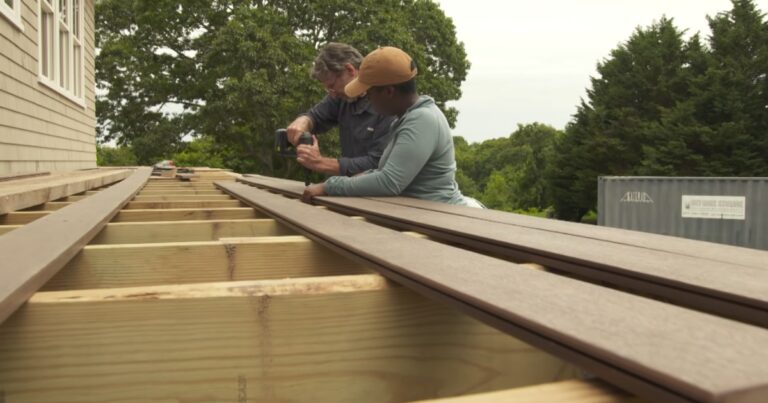
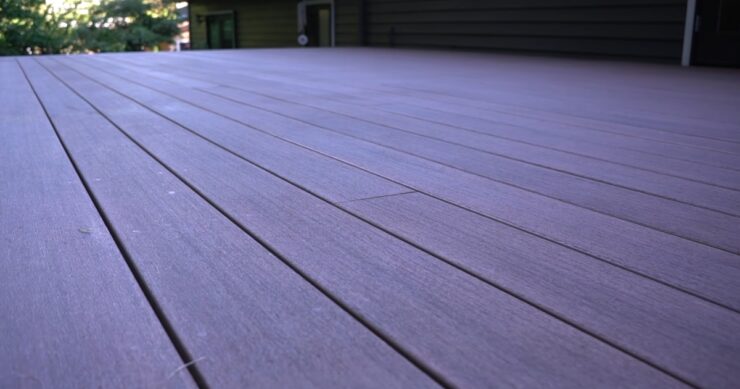
Attach Decking Boards
Attaching the decking boards is one of the final steps in building your deck frame. Whether you choose natural wood or composite decking, the process is similar:
- Start at One End: Begin attaching decking boards at one end of the deck and work your way to the other. Ensure that the boards are parallel to the house.
- Secure Boards: Use galvanized screws or decking clips to secure the boards to the joists. Follow the manufacturer’s guidelines for the specific decking material you’re using.
Secure the Deck Frame for Stability
Once the decking boards are in place, it’s essential to secure the entire deck frame for stability and safety. Here’s what you should do:
- Check Connections: Inspect all connections, including screws, hangers, and anchors, to ensure they are secure.
- Add Bracing: If your deck design requires additional bracing for support, install it according to your plans.
- Reinforce Railings: If your deck is elevated, install sturdy railings to provide safety for users.
Finish with Railings and Stairs
The final touches to your deck involve adding railings and stairs, if necessary. These components enhance both safety and aesthetics. Here’s how to finish your deck:
- Install Railings: Attach railings around the perimeter of the deck, ensuring they meet local building codes for height and spacing.
- Add Stairs: If your deck requires access to the ground or other levels, install stairs with handrails for safety.
Conclusion
In conclusion, building a sturdy deck frame is a rewarding project that can significantly enhance your outdoor living space. By following these essential tips and guidelines, you’ll be well-prepared to create a durable and safe deck that you can enjoy for years to come.
Remember to consult local building codes and manufacturer recommendations for specific materials to ensure the success of your project. Happy deck building!